AIR X SOFTWARE TUTORIAL

DEVICE VIDEOS

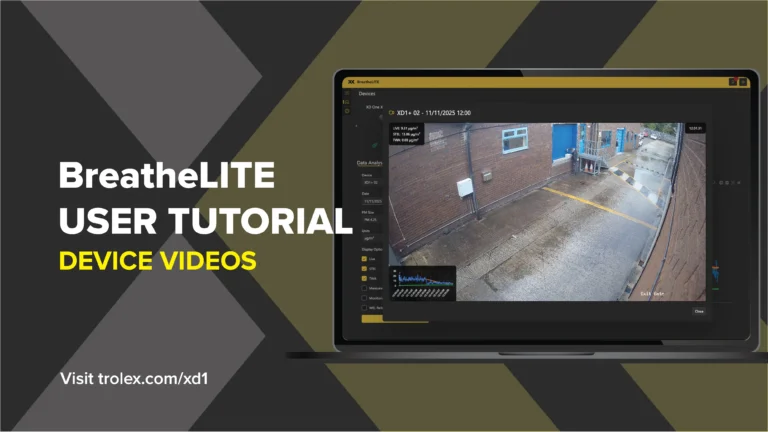
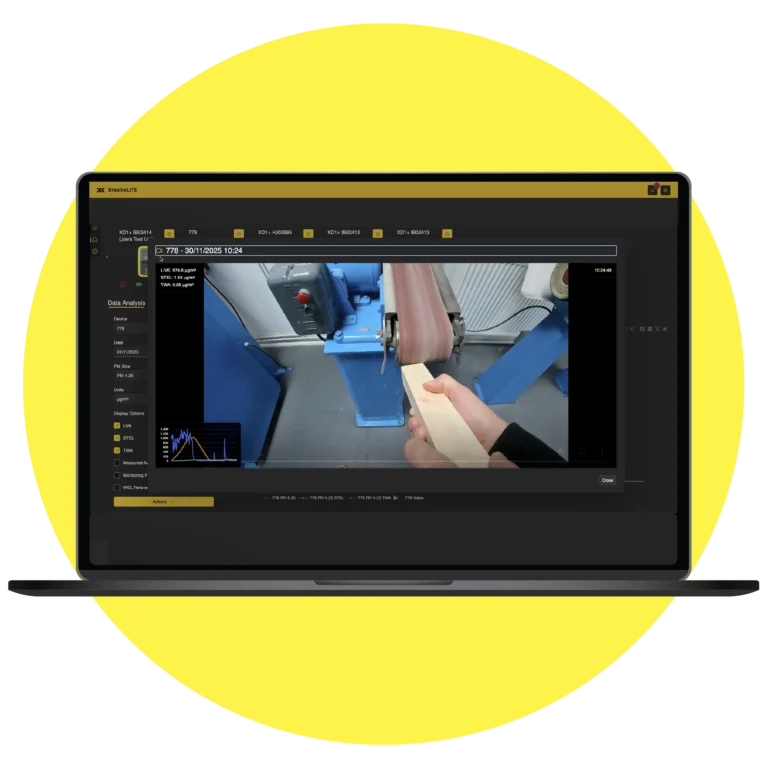
BreatheLITE lets you seamlessly import MP4 videos from video cameras and view them overlaid with synchronised dust monitor data. You can pinpoint when and where particle spikes occur, inspect timestamps and sensor readings together. 

You can only import .mp4 files up to 2GB in size. If you have a video that is not in this format, you will need to use a free online converter to change it into the correct format. 


BreatheLITE Device Videos tutorial

ADDING A VIDEO

To add a video, click the Device Button and select Videos. The video library dialog will open. In the Import Video tab, Click the Browse button and an open file dialog will be displayed. Select the desired .mp4 video file to import it. The file will then begin to be imported into BreatheLITE. 

Once the video is uploaded to the software, the next step is to confirm whether the timestamp of the video is correct. Getting the correct timestamp is vital for BreatheLITE to correctly overlay the device readings when a video is being viewed. You can amend any times or dates of videos by pressing the pencil button and click Save. The video will then import. 

A confirmation dialog will then be displayed to confirm the import. Click on the Yes button to complete the video import process. The video will then be available in the video library. 

BreatheLITE Device Videos tutorial: Adding a video

VIEWING A VIDEO USING VIDEO LIBRARY

To view a video using the Video Library, click the Device Button and select Videos. The video library dialog will open. Click on the Video Library tab and select the video you wish to view by clicking on the Play button. The video will then be displayed. 

To view a video using the Data Analysis component, select a device, date, PM size, Units of Measurement and all relevant Display Options and view the data. Once the chart has been displayed, if a video is found, a green play icon will appear on the chart. To view the video, click on the green play icon and the video will be displayed. 

BreatheLITE Device Videos tutorial: Viewing a video

VIEWING A VIDEO USING DATA ANALYSIS

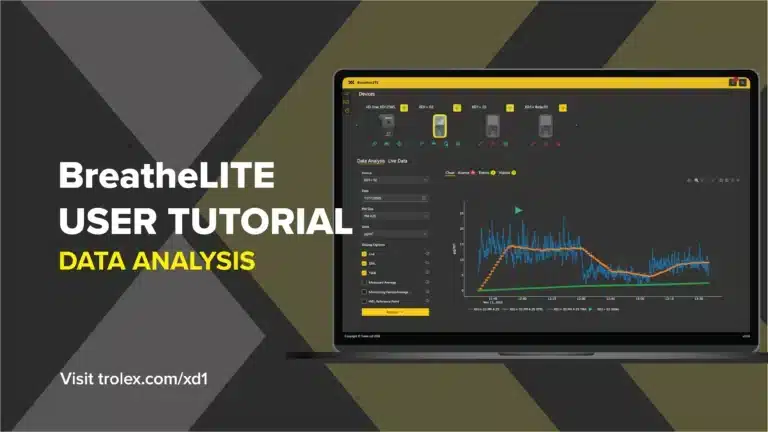
To view a video using the Data Analysis component, select a device, date, PM size, Units of Measurement and all relevant Display Options and view the data. Once the chart has been displayed, if a video is found, a green play icon will appear on the chart. To view the video, click on the green play icon and the video will be displayed. 

BreatheLITE Device Videos tutorial: Using video for data analysis

DELETING A VIDEO

To delete a video, click the Device Button and select Videos. The video library dialog will open. Click the Video Library tab and click the Delete button by the video you want to delete. A confirmation dialog will then be displayed. To delete the video, click the Yes button and the video will be removed. 

BreatheLITE Device Videos tutorial: Deleting a video

GOT PRODUCT QUESTIONS?

If the Trolex XD1+ STEL and TWA indicators are flashing red as shown below:

This means the Trolex XD1+ has detected an electronic failure of the internal memory. The XD1+ will alert the user and enter an error state.

If this happens, please contact our support team to raise a ticket.

AIR XD operates a protective thermal cut-out sequence when the temperature inside the instrument exceeds the maximum operating temperature of 45 °C.

This protective measure is in place to maintain the lifespan and operating functionality of the optical sensor assembly when the AIR XD is installed in environments with high ambient temperatures.

If the internal temperature of the instrument is suspected to be below -10°C, for example, if it has been left powered off for a period of time in a very cold environment, damage to the optical assembly may occur when power is applied.

Allow the instrument to reach safe operating temperature before applying power.

If all three device indicators are flashing red as shown below, this means the device has a non-recoverable operating error. 

If this is happening to your Trolex XD1+ device, please contact the Trolex service team to raise a new support ticket

Our AIR X Particulate Monitors don’t hold any of these accreditations.

No. The Group I manual states that the USB connector on the base of the equipment shall only be connected to the Trolex TX8805 AIR XD USB Drive in the hazardous area.

USB drives with no power source, such as standard USB sticks, may be connected to the USB connector in the safe area for test purposes.

AIR XD is designed to allow infrequent pressure washing during maintenance schedules, but the inlet cap must be closed first.

Keep an appropriate distance between the pressure washer and the instrument, and do not direct the water jet at the underside of the instrument because water must not enter the air flow path.

Yes. The AIR XD provides in and out RS485 terminals so multiple MODBUS devices can be daisy-chained.

Some network installations may require a termination resistor across RS485 lines A and B.

SEE MORE RESOURCES

AIR X PARTICULATE MONITORING

Image of TX8061 XD1+ Personal Dust Monitor
TX8061 XD1+ Personal Dust Monitor

Image of AIR X Software
AIR X Software

Image of TX8005 AIR XD Dust Monitor
TX8005 AIR XD Dust Monitor

Image of TX8100 AIR XS Silica Monitor
TX8100 AIR XS Silica Monitor

AIR X NEWS + CASE STUDIES

GET AIR X NEWS + UPDATES

    You may unsubscribe from these communications at any time. For more information on how to unsubscribe, our privacy practices, and how we are committed to protecting and respecting your privacy, please review our Privacy Policy.

    XD1+ SOFTWARE TUTORIAL

    ANALYSE YOUR DATA

    1. After data has been downloaded from a device, the data can then be analysed by the steps below: 
    2. Navigate to the Data Analysis tab. 
    3. From the Devices drop down menu, select the XD1+ device that you wish to view data for. 
    4. Once the device has been selected, chose the correct date for which the data was collected, by clicking on the Date drop down menu and select the desired date. The calendar only displays dates for which data is available. 
    5. Choose the relevant particle size you wish to view for, from either PM1, PM2.5, PM4.25, PM10.  
    6. Choose whether to view this data in µg/m³ or mg/m³ by selecting the relevant option in the Units drop down box. 
    7. Choose which chart options you wish to view, from the following: 
      • Live: particulate concentration is the real-time measurement of particulate levels, recorded every 10 seconds. 
      • STEL: represents the average particulate concentration over the most recent 15-minute period, calculated from the Live readings at each point in time. 
      • TWA: is the average particulate concentration over the monitoring period, adjusted to an 8-hour reference. If the monitoring period is shorter than 8 hours, the remaining time is assumed to have zero exposure. 
      • Measured average: is the cumulative average of all Live particulate concentrations from the start of the monitoring session up to the current point in time. 
      • Monitoring period average: is a fixed calculation of the average particulate concentration across the entire monitoring period, once the session has ended. 
      • WEL reference point: Workplace Exposure Limit is the legal concentration of airborne particulate plotted against Live readings. 
    8. To view the chart, click on the Actions button and select View Chart. 

    ADVANCED DATA ANALYSIS MODE

    If the normal data analysis view doesn’t fit your needs, you can enable the Advanced Data Analysis Mode feature, in the app settings. Once enabled, you’ll be able to select multiple devices and view data over a range of data. To view the chart:

    1. Select a device or multiple devices from the Devices drop down menu. 
    2. Next select the Start Date and End Date for the time period you wish to view. 
    3. Choose which particle size you wish to view, for either PM1, PM2.5, PM4.25 or PM10. 
    4. Choose whether to view the data in µg/m³ or mg/m³ by selecting the relevant option in the Units drop down box.  
    5. Choose which chart options you wish to view. 
    6. View the chart by clicking Actions and select View Chart. 
    BreatheLITE Data Analysis tutorial: Advanced analysis mode

    CHART OPTIONS

     Once a chart has been displayed on the screen, there’s a list of icons that are displayed in the top right-hand corner as shown below, these are: 

    • Save the current chart as a PNG file. 
    • Zoom into the chart; click and hold the left mouse button to zoom in on the chart. 
    • Pan around the chart; click and hold the left mouse button to pan. 
    • Draw a box on the chart. 
    • Draw a lasso on the chart. 
    • Click and zoom into the chart. 
    • Click and zoom out of the chart. 
    • Auto scale. 
    • Reset chart axis. 
    BreatheLITE Data Analysis tutorial: Chart options

    EXPORTING DATA

     To export the data from BreatheLITE to a delimited file format for use with apps such as Excel, follow these steps: 

    1. Navigate to the Data Analysis tab. 
    2. From the Devices drop down menu, select the XD1+ device you wish to export data for. 
    3. Once the relevant device is selected, choose the relevant date by clicking on the Date drop down menu and selecting the desired date. 
    4. Choose which particle size you wish to view for from PM1, PM2.5, PM4.25 or PM10. 
    5. Choose to view the data in either ug/m3 or mg/m3. 
    6. To finish exporting the data, click on the Action Button and select Export to Delimited File. The data will then be exported into the following directories, and the file will also be displayed on the screen: 
    • Windows – C:\ProgramData\BreatheLite\Data 
    • Mac – $UserDirectory\.BreatheLite\Data 

    You can also do the same when exporting data into an Excel file, by following the same steps, then selecting Export to Excel. 

    BreatheLITE Data Analysis tutorial: Exporting data to delimited file

    GOT PRODUCT QUESTIONS?

    If the Trolex XD1+ STEL and TWA indicators are flashing red as shown below:

    This means the Trolex XD1+ has detected an electronic failure of the internal memory. The XD1+ will alert the user and enter an error state.

    If this happens, please contact our support team to raise a ticket.

    AIR XD operates a protective thermal cut-out sequence when the temperature inside the instrument exceeds the maximum operating temperature of 45 °C.

    This protective measure is in place to maintain the lifespan and operating functionality of the optical sensor assembly when the AIR XD is installed in environments with high ambient temperatures.

    If the internal temperature of the instrument is suspected to be below -10°C, for example, if it has been left powered off for a period of time in a very cold environment, damage to the optical assembly may occur when power is applied.

    Allow the instrument to reach safe operating temperature before applying power.

    If all three device indicators are flashing red as shown below, this means the device has a non-recoverable operating error. 

    If this is happening to your Trolex XD1+ device, please contact the Trolex service team to raise a new support ticket

    Our AIR X Particulate Monitors don’t hold any of these accreditations.

    No. The Group I manual states that the USB connector on the base of the equipment shall only be connected to the Trolex TX8805 AIR XD USB Drive in the hazardous area.

    USB drives with no power source, such as standard USB sticks, may be connected to the USB connector in the safe area for test purposes.

    AIR XD is designed to allow infrequent pressure washing during maintenance schedules, but the inlet cap must be closed first.

    Keep an appropriate distance between the pressure washer and the instrument, and do not direct the water jet at the underside of the instrument because water must not enter the air flow path.

    Yes. The AIR XD provides in and out RS485 terminals so multiple MODBUS devices can be daisy-chained.

    Some network installations may require a termination resistor across RS485 lines A and B.

    SEE MORE RESOURCES

    PARTICULATE MONITORING

    Image of TX8061 XD1+ Personal Dust Monitor
    TX8061 XD1+ Personal Dust Monitor

    Image of TX8005 AIR XD Dust Monitor
    TX8005 AIR XD Dust Monitor

    Image of TX8100 AIR XS Silica Monitor
    TX8100 AIR XS Silica Monitor

    Image of AIR X Software
    AIR X Software

    GET AIR X NEWS + UPDATES

      You may unsubscribe from these communications at any time. For more information on how to unsubscribe, our privacy practices, and how we are committed to protecting and respecting your privacy, please review our Privacy Policy.

      XD1+ SOFTWARE TUTORIAL

      PLEASE NOTE

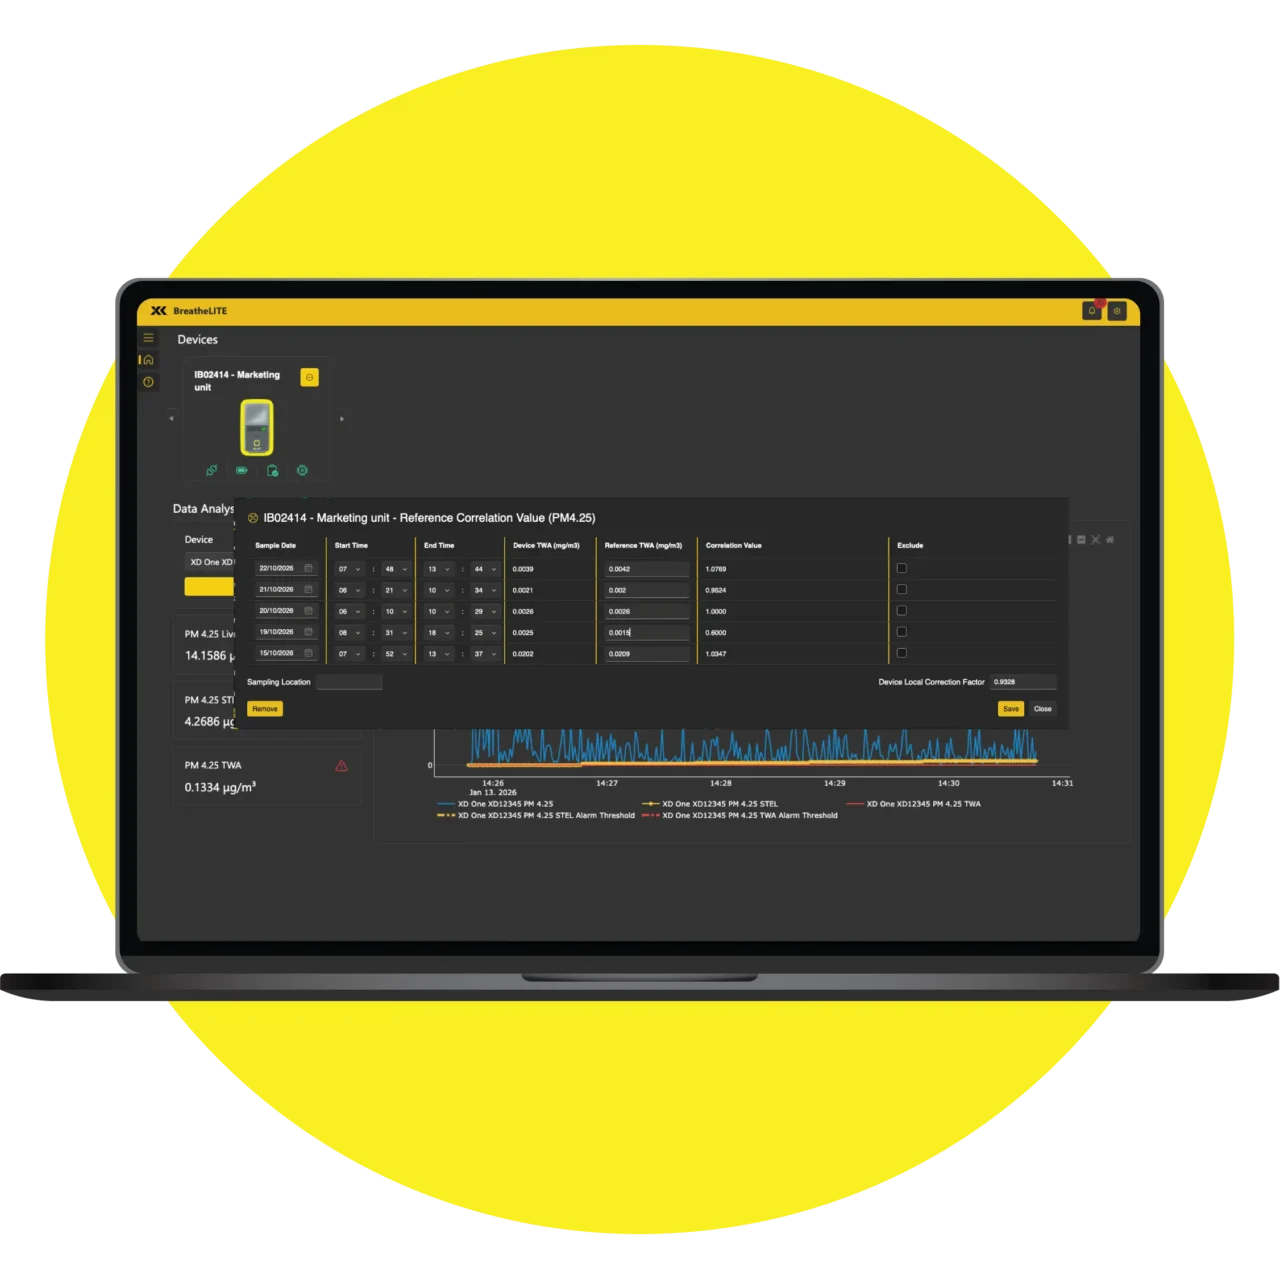
      Before a Local Correction Factor can be calculated or applied, a minimum of five data sets, with at least four hours of sampling is required for comparison purposes. For accurate correction, ensure that the reference sample measurement duration matches the data collected from your XD1+. 

      It’s recommended that when reference samples are taken alongside the XD1+ measurements, care is taken to consider sampling location, sampling distances and environmental influences – all of which can influence dust readings. 

      ADDING A LOCAL CORRECTION FACTOR

      To add a Local Correction Factor, follow these steps:

      1. Navigate to the XD1+ device in the devices section and click on the Device button.  
      2. Select the Local Correction Factor button.  
      3. For each sample data, enter the reference TWA value. The reference values need to be entered in mg/m3. 
      4. Ensure that the reference TWA values are accurately entered for each sample date to maintain the integrity of the Local Correction Factor. A reference TWA value can be excluded from the Local Correction Factor calculation if its deemed invalid or irrelevant for a particular sample date. 
      5. After entering the reference TWA values for each sample date, enter the Sampling Location.  
      6. Once all of the data has been added and any exclusions have been made, you can proceed to save the Local Correction Factor by clicking the save button.  
      7. The dialog box will then close and the XD1+ will now show that it has a Local Correction Factor. 
      BreatheLITE Local Correction Factor tutorial: Adding a Local Correction Factor

      REMOVING A LOCAL CORRECTION FACTOR

      To remove a Local Correction Factor, follow these steps: 

      1. Navigate to the XD1+ device in the devices section and click on the Devices button.  
      2. From the menu that appears, select the Local Correction Factor to proceed with removing an existing Local Correction Factor. 
      3. Click on the Remove button in the bottom left section of the dialog. A dialog will then be displayed asking you to confirm the removal of the Local Correction Factor.  
      4. Click Yes to proceed and No to abort the removal. If you clicked yes, the Local Correction Factor will then be removed from the device. 
      BreatheLITE Local Correction Factor tutorial: Removing Local Correction Factor

      GOT PRODUCT QUESTIONS?

      If the Trolex XD1+ STEL and TWA indicators are flashing red as shown below:

      This means the Trolex XD1+ has detected an electronic failure of the internal memory. The XD1+ will alert the user and enter an error state.

      If this happens, please contact our support team to raise a ticket.

      AIR XD operates a protective thermal cut-out sequence when the temperature inside the instrument exceeds the maximum operating temperature of 45 °C.

      This protective measure is in place to maintain the lifespan and operating functionality of the optical sensor assembly when the AIR XD is installed in environments with high ambient temperatures.

      If the internal temperature of the instrument is suspected to be below -10°C, for example, if it has been left powered off for a period of time in a very cold environment, damage to the optical assembly may occur when power is applied.

      Allow the instrument to reach safe operating temperature before applying power.

      If all three device indicators are flashing red as shown below, this means the device has a non-recoverable operating error. 

      If this is happening to your Trolex XD1+ device, please contact the Trolex service team to raise a new support ticket

      Our AIR X Particulate Monitors don’t hold any of these accreditations.

      No. The Group I manual states that the USB connector on the base of the equipment shall only be connected to the Trolex TX8805 AIR XD USB Drive in the hazardous area.

      USB drives with no power source, such as standard USB sticks, may be connected to the USB connector in the safe area for test purposes.

      AIR XD is designed to allow infrequent pressure washing during maintenance schedules, but the inlet cap must be closed first.

      Keep an appropriate distance between the pressure washer and the instrument, and do not direct the water jet at the underside of the instrument because water must not enter the air flow path.

      Yes. The AIR XD provides in and out RS485 terminals so multiple MODBUS devices can be daisy-chained.

      Some network installations may require a termination resistor across RS485 lines A and B.

      SEE MORE RESOURCES

      PARTICULATE MONITORING

      Image of TX8061 XD1+ Personal Dust Monitor
      TX8061 XD1+ Personal Dust Monitor

      Image of AIR X Software
      AIR X Software

      Image of TX8005 AIR XD Dust Monitor
      TX8005 AIR XD Dust Monitor

      Image of TX8100 AIR XS Silica Monitor
      TX8100 AIR XS Silica Monitor

      AIR X NEWS + CASE STUDIES

      GET AIR X NEWS + UPDATES

        You may unsubscribe from these communications at any time. For more information on how to unsubscribe, our privacy practices, and how we are committed to protecting and respecting your privacy, please review our Privacy Policy.

        XD1+ SOFTWARE TUTORIAL

        VIEW YOUR DATA

        Live data monitoring allows you to view real-time Live, STEL and TWA particulate matter readings from your connected device. To start live data monitoring for your device: 

        1. Navigate to the Live Readings tab and select the relevant XD1+ device from the dropdown menu. 
        2. After selecting the relevant device, click on the Start button. The live data display will update in real-time with the latest readings from the device. 
        3. The live data display includes the following components: 
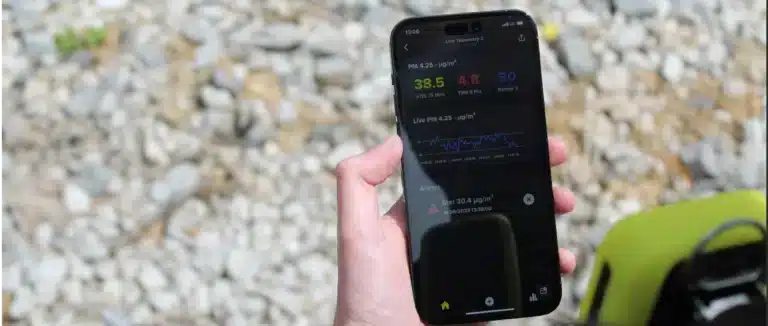
          • Measurement Cards: 3 cards display the current Live, STEL and TWA for your device’s selected Particle Matter size and units. 
          • Live Data Chart: A real-time chart plots the selected Live (in blue), STEL (in yellow) and TWA (in red) readings with automatic Y-axis scaling, time-stamped X-axis, and threshold lines for STEL and TWA alarms. The chart supports panning, zooming, resetting, and autoscaling.
        4. To stop live monitoring, click on the Stop button. The device will then return back to its previous operating mode. 
        BreatheLITE Live Data Monitoring tutorial

        GOT PRODUCT QUESTIONS?

        If the Trolex XD1+ STEL and TWA indicators are flashing red as shown below:

        This means the Trolex XD1+ has detected an electronic failure of the internal memory. The XD1+ will alert the user and enter an error state.

        If this happens, please contact our support team to raise a ticket.

        AIR XD operates a protective thermal cut-out sequence when the temperature inside the instrument exceeds the maximum operating temperature of 45 °C.

        This protective measure is in place to maintain the lifespan and operating functionality of the optical sensor assembly when the AIR XD is installed in environments with high ambient temperatures.

        If the internal temperature of the instrument is suspected to be below -10°C, for example, if it has been left powered off for a period of time in a very cold environment, damage to the optical assembly may occur when power is applied.

        Allow the instrument to reach safe operating temperature before applying power.

        If all three device indicators are flashing red as shown below, this means the device has a non-recoverable operating error. 

        If this is happening to your Trolex XD1+ device, please contact the Trolex service team to raise a new support ticket

        Our AIR X Particulate Monitors don’t hold any of these accreditations.

        No. The Group I manual states that the USB connector on the base of the equipment shall only be connected to the Trolex TX8805 AIR XD USB Drive in the hazardous area.

        USB drives with no power source, such as standard USB sticks, may be connected to the USB connector in the safe area for test purposes.

        AIR XD is designed to allow infrequent pressure washing during maintenance schedules, but the inlet cap must be closed first.

        Keep an appropriate distance between the pressure washer and the instrument, and do not direct the water jet at the underside of the instrument because water must not enter the air flow path.

        Yes. The AIR XD provides in and out RS485 terminals so multiple MODBUS devices can be daisy-chained.

        Some network installations may require a termination resistor across RS485 lines A and B.

        SEE MORE RESOURCES

        PARTICULATE MONITORING

        Image of TX8061 XD1+ Personal Dust Monitor
        TX8061 XD1+ Personal Dust Monitor

        Image of AIR X Software
        AIR X Software

        Image of TX8005 AIR XD Dust Monitor
        TX8005 AIR XD Dust Monitor

        Image of TX8100 AIR XS Silica Monitor
        TX8100 AIR XS Silica Monitor

        AIR X NEWS + CASE STUDIES

        GET AIR X NEWS + UPDATES

          You may unsubscribe from these communications at any time. For more information on how to unsubscribe, our privacy practices, and how we are committed to protecting and respecting your privacy, please review our Privacy Policy.

          XD1+ SOFTWARE TUTORIAL

          DEVICE MAINTENANCE SETTINGS

          To keep your XD1+ device running optimally, we recommend running a Compliance Check on the device every 90 days. To perform a compliance check on a device we recommend that you purchase a Trolex Compliance Pack+. 

          In addition to running a compliance check, we recommend that you always keep your device’s firmware up to date to ensure optimal performance and security. We recommend that you enable the ‘Check for Firmware Updates’ in the app settings. 

          BreatheLITE Device Maintenance tutorial: Settings walkthrough

          COMPLIANCE CHECK

          To run a compliance check on a device ensure you’ve connected your XD1+ device to the software. Click the Device button and select Compliance check and the following screen will then by displayed:  

          1. To run the Compliance Check, make sure you have the Trolex Compliance Pack ready and then click on the start button. The Compliance Check process will then begin.  
          2. The display will inform the user to dose the device with the permitted dust spray available from Trolex. Spray the device for the duration of the test. 
          3. Once the test has finished, the result will then be displayed stating whether the device has passed or failed. 
          4. Click the Close button once the test has finished to return to the app. 
          BreatheLITE Device Maintenance tutorial: Completing a compliance check walkthrough

          VIEW PREVIOUS RESULTS

          To view previous Compliance Check results, click the Device Button and select Compliance Check. The following screen with then be displayed: 

          1. Click on the Previous Results tab.  
          2. A list of previous results is displayed with timestamps and a clear pass/fail status for each device. 
          BreatheLITE Device Maintenance tutorial: Viewing previous results

          AUTOMATICALLY UPDATING FIRMWARE

          Upgrading your device’s firmware is an important step to keep it running smoothly and securely. However, it’s important to note that this process will erase all of the data on your device. Before proceeding with the update, we highly recommend downloading all of the data before updating.  

          1. Locate the Settings and make sure the Automatically Check for Firmware Updates box is checked. 
          2. In the Devices section, you will see the devices that have a firmware update. 
          3. Click on the Devices button and select Firmware Update.  
          4. A new popup will then be displayed, click on the Update button to progress. 
          5. The firmware will then be downloaded onto the device. 
          6. Once the firmware has been downloaded onto the device, the firmware will then be verified. 
          7. Once the firmware has been verified, it will the display whether it was updated successfully or not. 
          8. Once finished, click on the close button. 
          BreatheLITE Device Maintentance tutorial: Automatically updating firmware

          MANUALLY UPDATING FIRMWARE

          Upgrading your device’s firmware is an important step to keep it running smoothly and securely. However, it’s important to note that this process will erase all of the data on your device. Before proceeding with the update, we highly recommend downloading all of the data before updating. 

          To update the device firmware, please follow the steps below: 

          1. Within the app Settings, make sure the Automatically Check for Firmware Updates is disabled. 
          2. Click the Device Button and select Firmware Update. 
          3. The firmware update dialog box with be displayed. 
          4. Select the TDFU file to upload to the device by clicking on the Browse section and a select file dialog will be displayed. Choose the TDFU file to upload. 
          5. Select update, and the firmware will be downloaded onto the device. 
          6. Once the firmware has been downloaded onto the device, the firmware will then be verified. 
          7. Once the firmware has been verified, it will then display whether it was updated successfully or not. 
          8. Once finished, click on the close button. 

          GOT PRODUCT QUESTIONS?

          If the Trolex XD1+ STEL and TWA indicators are flashing red as shown below:

          This means the Trolex XD1+ has detected an electronic failure of the internal memory. The XD1+ will alert the user and enter an error state.

          If this happens, please contact our support team to raise a ticket.

          AIR XD operates a protective thermal cut-out sequence when the temperature inside the instrument exceeds the maximum operating temperature of 45 °C.

          This protective measure is in place to maintain the lifespan and operating functionality of the optical sensor assembly when the AIR XD is installed in environments with high ambient temperatures.

          If the internal temperature of the instrument is suspected to be below -10°C, for example, if it has been left powered off for a period of time in a very cold environment, damage to the optical assembly may occur when power is applied.

          Allow the instrument to reach safe operating temperature before applying power.

          If all three device indicators are flashing red as shown below, this means the device has a non-recoverable operating error. 

          If this is happening to your Trolex XD1+ device, please contact the Trolex service team to raise a new support ticket

          Our AIR X Particulate Monitors don’t hold any of these accreditations.

          No. The Group I manual states that the USB connector on the base of the equipment shall only be connected to the Trolex TX8805 AIR XD USB Drive in the hazardous area.

          USB drives with no power source, such as standard USB sticks, may be connected to the USB connector in the safe area for test purposes.

          AIR XD is designed to allow infrequent pressure washing during maintenance schedules, but the inlet cap must be closed first.

          Keep an appropriate distance between the pressure washer and the instrument, and do not direct the water jet at the underside of the instrument because water must not enter the air flow path.

          Yes. The AIR XD provides in and out RS485 terminals so multiple MODBUS devices can be daisy-chained.

          Some network installations may require a termination resistor across RS485 lines A and B.

          MORE RESOURCES

          PARTICULATE MONITORING

          Image of TX8061 XD1+ Personal Dust Monitor
          TX8061 XD1+ Personal Dust Monitor

          Image of AIR X Software
          AIR X Software

          Image of TX8005 AIR XD Dust Monitor
          TX8005 AIR XD Dust Monitor

          Image of TX8100 AIR XS Silica Monitor
          TX8100 AIR XS Silica Monitor

          AIR X NEWS + CASE STUDIES

          GET AIR X NEWS + UPDATES

            You may unsubscribe from these communications at any time. For more information on how to unsubscribe, our privacy practices, and how we are committed to protecting and respecting your privacy, please review our Privacy Policy.

            XD1+ SOFTWARE TUTORIAL

            MANAGING DEVICES

            BreatheLITE centralises management of all your XD1+ devices, simplifying device set-up, alarm configuration and profile management for site monitoring and reporting. Here’s how you can add and configure your XD1+ devices. 

            BreatheLITE Devce Management tutorial: Managing devices

            ADDING A DEVICE

            The simplest way to add a device is to enable Automatic Device Discovery in the App Settings. When this is enabled, devices will automatically be populated after five seconds. If not follow these steps: 

            1. If Automatic Device Discovery is disabled, you can manually add the device by clicking the Add Device button in the Devices section. 
            2. After clicking the Add Device button, a pop-up will be displayed asking you to enter the device’s serial number and model. 
            3. Enter the device’s serial number into the text box and select the device model from the drop down. The device serial number can be found on the back of your XD1+ device.  
            4. After entering the information, click the ave button. Once the device has been added, it will be displayed in the Devices section. 
            BreatheLITE Device Management tutorial: Adding a device

            DEVICE LIST

            Once a device is added to the app, it appears in the Devices section. The device will be shown in colour if its connected, or in greyscale if it’s disconnected. 

            For each device, the name is always displayed in the top left-hand corner. Here’s what each icon next to the device icon means:  

            • Device Menu Options:Top right – Open device settings, manage videos and other actions. 
            • Connection Status: Bottom left – Indicates whether a device is connected or disconnected. 
            • Battery: Bottom Middle left – Shows current battery state. Hover to view the exact battery percentage. 
            • Compliance check: Bottom Middle right – Indicates if a compliance check is due. Hover to see the due date. 
            • Firmware: Bottom right – Shows whether firmware is up to date. Hover to view the device’s firmware version. 
            BreatheLITE Device Management tutorial: Device list

            MENU OPTIONS

            To open the device menu, click the Devices Button in the top right and a list of actions will be displayed including:  

            • Settings: Configure XD1+ device preferences and options.
            • Videos: Import and manage videos for this XD1+ device. 
            • Download Data: Download the latest XD1+ device data. 
            • Firmware Update: Update your XD1+ device firmware. 
            • Compliance Check: Run a compliance check on your XD1+ device and view past results. 
            • Identify: Locate or identify a specific XD1+ device. 
            • Clear Data: Remove stored data from your XD1+ device. 
            • Archive: Archive your XD1+ device. 
            BreatheLITE Device Management tutoral: Device menu options

            CONFIGURE A DEVICE

            To configure an XD1+ device for personalisation, click the Devices Button and select Settings. The following options will be available: 

            • Name: Select a name for your XD1+ device. We recommend choosing a name unique to the job or activity you’re working on or the personnel using it. 
            • Operating mode: Select device operating mode based on application. Choose from Normal, Cab, DataLog or Error. 
            • Alarm PM size: Select the Particulate measurement size that the device will alarm on. Choose from PM1, PM2.5, PM4.25 or PM10. 
            • Units: Decide your preferred units of measurement, for either µg/m³ or mg/m³.
            • TWA period (minutes): Set the TWA period to align with working requirements, up to 12 hours. 
            • TWA threshold (µg/m³): Set the TWA Alarm Threshold based on permissible exposure limits. This is the value that the TWA alarm will trigger on once the exposure threshold is reached. 
            • STEL period (minutes): Set the STEL period to align with working requirements, up to 15 minutes. 
            • STEL threshold (µg/m³): Set the STEL Alarm Threshold based on permissible exposure limits. This is the value that the STEL alarm will trigger on once the exposure threshold is reached. 
            • Log rate (Seconds): Set the data log rate for the device. Max log period 60 seconds, minimum 10 seconds. 
            • Minimum shift time (seconds): Set the minimum shift time for the XD1+ in seconds. 
            • Material profile: Choose the dust profile that matches your environment. See more below. 

            Once all changes have been made, click the Save button and apply the new settings. A notification will then be displayed to show the device settings were successfully saved. 


            BreatheLITE Device Management tutorial: Configuring a device

            MATERIAL PROFILES

            Your XD1+ device supports material profiles that allows you to configure the device based on the type of material being monitored. To configure a material profile, click on the Devices Button and select Settings. In the settings dialogue navigate to the Material Profiles section. 

            Click on the Material Profile drop down box and select the material profile you wish to use. The following material profiles are supported: 

            • Default 
            • Flour dust 
            • Metal fabrication 
            • Stone 
            • Wood 

            Always ensure that the selected material profile accurately reflects the type of material you are monitoring. If you’re working with one of the listed material profile options, select it from the drop-down list, if you’re working with mixed substances or don’t know what dust you may be exposed to, then select the Default option.  

            Once you have selected the material profile, remember to press save. 

            BreatheLITE Device Management tutorial: Material profiles

            MANUALLY CONNECTING TO A DEVICE

            If you have Automatic Device Detection enabled, you can skip this step but if not, follow these steps to manually connect to a device: 

            1. Click on the Devices Button for the relevant XD1+ device and select Connect.  
            2. The app will then attempt to connect to the device. Once connected, the Connection icon will turn green. 
            3. Once the device is connected, you can then change the device settings or download data as shown in the next section. 

            DOWNLOADING DATA

            If you have Automatic Data Download enabled, the app will automatically download data in the background about a minute after connecting the device. A notification will appear in the Notification Centre when the download is complete. 

            If you don’t have this feature enabled, you can manually download the data by following these steps: 

            1. Click on the Devices Button for the relevant XD1+ device and select Download Data. 
            2. The software will then attempt to connect to the device and download the data. 
            3. The dialog box will display the progress of the data download. 
            4. Once all the data is downloaded click the Close button to finish. To view downloaded data, navigate to the Data Analysis section. 
            BreatheLITE Device Management tutorial: Downloading data

            IDENTIFY A DEVICE

            If you have multiple devices connected to the software and you want to know which one is which, you can use the identify feature: 

            1. Click on the Devices Button for the relevant XD1+ device and select Identify. 
            2. The LEDs on the front of the selected device will then flash to identify itself. 
            BreatheLITE Device Management tutorial: Identifying a device

            CLEAR DATA

            If you want to manually clear data from a device: 

            1. Click on the Devices Button for the relevant XD1+ device and select Clear Data. 
            2. A confirmation dialog will appear. 
            3. Click Yes to confirm the deletion of the device or No to cancel. 
            4. Once the data has been cleared, a notification will be displayed to confirm the data was successfully deleted. 
            BreatheLITE Device Management tutorial: Manually clear data

            ARCHIVE A DEVICE

            If you have a device you no longer use, you can archive it to remove it from the active device list without deleting its data, by following these steps:  

            1. Click on the Devices utton for the relevant XD1+ device and select Archive. 
            2. A confirmation dialog will appear.  
            3. Click Yes to confirm the archiving of the device or No to cancel. 
            BreatheLITE Device Management tutorial: Archive a device

            GOT PRODUCT QUESTIONS?

            If the Trolex XD1+ STEL and TWA indicators are flashing red as shown below:

            This means the Trolex XD1+ has detected an electronic failure of the internal memory. The XD1+ will alert the user and enter an error state.

            If this happens, please contact our support team to raise a ticket.

            AIR XD operates a protective thermal cut-out sequence when the temperature inside the instrument exceeds the maximum operating temperature of 45 °C.

            This protective measure is in place to maintain the lifespan and operating functionality of the optical sensor assembly when the AIR XD is installed in environments with high ambient temperatures.

            If the internal temperature of the instrument is suspected to be below -10°C, for example, if it has been left powered off for a period of time in a very cold environment, damage to the optical assembly may occur when power is applied.

            Allow the instrument to reach safe operating temperature before applying power.

            If all three device indicators are flashing red as shown below, this means the device has a non-recoverable operating error. 

            If this is happening to your Trolex XD1+ device, please contact the Trolex service team to raise a new support ticket

            Our AIR X Particulate Monitors don’t hold any of these accreditations.

            No. The Group I manual states that the USB connector on the base of the equipment shall only be connected to the Trolex TX8805 AIR XD USB Drive in the hazardous area.

            USB drives with no power source, such as standard USB sticks, may be connected to the USB connector in the safe area for test purposes.

            AIR XD is designed to allow infrequent pressure washing during maintenance schedules, but the inlet cap must be closed first.

            Keep an appropriate distance between the pressure washer and the instrument, and do not direct the water jet at the underside of the instrument because water must not enter the air flow path.

            Yes. The AIR XD provides in and out RS485 terminals so multiple MODBUS devices can be daisy-chained.

            Some network installations may require a termination resistor across RS485 lines A and B.

            SEE MORE RESOURCES

            PARTICULATE MONITORING

            Image of TX8061 XD1+ Personal Dust Monitor
            TX8061 XD1+ Personal Dust Monitor

            Image of AIR X Software
            AIR X Software

            Image of TX8005 AIR XD Dust Monitor
            TX8005 AIR XD Dust Monitor

            Image of TX8100 AIR XS Silica Monitor
            TX8100 AIR XS Silica Monitor

            AIR X NEWS + CASE STUDIES

            GET AIR X NEWS + UPDATES

              You may unsubscribe from these communications at any time. For more information on how to unsubscribe, our privacy practices, and how we are committed to protecting and respecting your privacy, please review our Privacy Policy.

              XD1+ SOFTWARE TUTORIAL

              APP SETTINGS

              When the Automatic Device Detection setting is enabled, the app will try to automatically detect compatible devices when they are connected to your desktop. We recommend enabling this setting to simplify device management. 

              When this is enabled, the app will automatically download device data for connected devices. This helps ensure that the app always has the latest device data without manual intervention. 

              When this setting is enabled, the app will check for available firmware updates for connected devices. Keeping firmware up to data can improve device performance and add new features. 

               When this setting is enabled, timestamps will be displayed on the video chart to provide a clear timeline of events.

              When this setting is enabled, the Data Analysis section of the app will allow you to analyse data for multiple devices over a selected period of time. 

              When this setting is enabled, the app will apply the global settings universally across all devices, when a device is connected. This ensures a consistent configuration experience. When this is enabled the following is displayed:

              • Operating mode: Select device operating mode based on application. Choose from Normal, Cab, DataLog or Error. 
              • Alarm PM size: Select the Particulate Measurement size that the device will alarm on. Choose from PM1, PM2.5, PM4.25 or PM10. 
              • Units: Decide your preferred units of measurement, for either µg/m³ or mg/m³
              • TWA period (Minutes): Set the TWA period to align with working requirements, up to 12 hours. 
              • TWA threshold (µg/m³): Set the TWA Alarm threshold based on permissible exposure limits. This is the value that the TWA alarm will trigger on once the exposure threshold is reached. 
              • STEL period (minutes): Set the STEL period to align with working requirements, up to 15 minutes. 
              • STEL threshold (µg/m³): Set the STEL Alarm threshold based on permissible exposure limits. This is the value that the STEL alarm will trigger on once the exposure threshold is reached. 
              • Log rate (seconds): Set the data log rate for the device. Max log period 60 seconds, minimum 10 seconds.
              • Minimum shift time (seconds): Set the minimum shift time for the XD1+ in seconds.
              • Material Profile: Choose the dust profile that matches your environment. 

              GOT PRODUCT QUESTIONS?

              If the Trolex XD1+ STEL and TWA indicators are flashing red as shown below:

              This means the Trolex XD1+ has detected an electronic failure of the internal memory. The XD1+ will alert the user and enter an error state.

              If this happens, please contact our support team to raise a ticket.

              AIR XD operates a protective thermal cut-out sequence when the temperature inside the instrument exceeds the maximum operating temperature of 45 °C.

              This protective measure is in place to maintain the lifespan and operating functionality of the optical sensor assembly when the AIR XD is installed in environments with high ambient temperatures.

              If the internal temperature of the instrument is suspected to be below -10°C, for example, if it has been left powered off for a period of time in a very cold environment, damage to the optical assembly may occur when power is applied.

              Allow the instrument to reach safe operating temperature before applying power.

              If all three device indicators are flashing red as shown below, this means the device has a non-recoverable operating error. 

              If this is happening to your Trolex XD1+ device, please contact the Trolex service team to raise a new support ticket

              Our AIR X Particulate Monitors don’t hold any of these accreditations.

              No. The Group I manual states that the USB connector on the base of the equipment shall only be connected to the Trolex TX8805 AIR XD USB Drive in the hazardous area.

              USB drives with no power source, such as standard USB sticks, may be connected to the USB connector in the safe area for test purposes.

              AIR XD is designed to allow infrequent pressure washing during maintenance schedules, but the inlet cap must be closed first.

              Keep an appropriate distance between the pressure washer and the instrument, and do not direct the water jet at the underside of the instrument because water must not enter the air flow path.

              Yes. The AIR XD provides in and out RS485 terminals so multiple MODBUS devices can be daisy-chained.

              Some network installations may require a termination resistor across RS485 lines A and B.

              SEE MORE RESOURCES

              PARTICULATE MONITORING

              Image of TX8061 XD1+ Personal Dust Monitor
              TX8061 XD1+ Personal Dust Monitor

              Image of AIR X Software
              AIR X Software

              Image of TX8005 AIR XD Dust Monitor
              TX8005 AIR XD Dust Monitor

              Image of TX8100 AIR XS Silica Monitor
              TX8100 AIR XS Silica Monitor

              AIR X NEWS + CASE STUDIES

              GET AIR X NEWS + UPDATES

                You may unsubscribe from these communications at any time. For more information on how to unsubscribe, our privacy practices, and how we are committed to protecting and respecting your privacy, please review our Privacy Policy.

                XD1+ SOFTWARE TUTORIAL

                THE FEATURES

                BreatheLITE is the software application for configuring, monitoring, and analysing data from the XD1+ Personal Dust Monitor. The application provides the following features: 

                • Device Configuration: For setting up and configuring your XD1+ device. 
                • Real Time Monitoring: To view live data streams from all connected XD1+ devices. 
                • Historical Data Analysis: Where you can access and analyse past data records. 
                • Compliance Testing: To perform checks on XD1+ against industry standards. 
                • Alarm Management: For configuring and monitoring all alarms and events collected by XD1+. 
                • Firmware Updates: When you need to update device firmware directly from the application. 
                • Multi-Device Support: For managing multiple XD1+ devices simultaneously. 
                • Video Support: Where you can import and view any mp4 video files into BreatheLITE. 
                BreatheLITE Getting Started tutorial – Software features

                GETTING STARTED WIZARD

                When BreatheLITE loads for the first time, a Getting Started Wizard will guide you through the initial setup process. The wizard consists of several steps designed to help you configure the application and help you to get started quickly:

                1. Welcome: A brief welcome message to help you getting BreatheLITE set-up. 
                2. Database Upgrade: If BreatheLITE has been upgraded from a previous version, the wizard will automatically detect and upgrade the database to the latest version. 
                3. Automatic Device Detection: Choose whether to enable automatic device detection when an XD1+ is connected via USB. This feature simplifies the process of connecting and managing devices. 
                4. Automatic Data Download: You can also enable Automatic Data Download from connected devices. This feature allows BreatheLITE to automatically retrieve data from devices whenever they’re connected, ensuring that you always have the latest information available. 
                5. Check for Device Updates: Choose whether to enable automatic firmware updates for connected devices (recommended). This feature ensures that your devices are always running the latest firmware version, which can include important bug fixes and new features. 
                6. Compliance Checks: To keep your devices running optimally, we require that you run a compliance check every 90 days.  
                7. Get Started: Once all the previous steps have been completed, the Getting Started Wizard will display a completion screen. You can now start using BreatheLITE to manage and monitor your XD1+ device. 
                BreatheLITE Getting Started tutorial: Setup wizard

                SEE MORE RESOURCES

                AIR X PARTICULATE MONITORING

                Image of TX8061 XD1+ Personal Dust Monitor
                TX8061 XD1+ Personal Dust Monitor

                Image of AIR X Software
                AIR X Software

                Image of TX8005 AIR XD Dust Monitor
                TX8005 AIR XD Dust Monitor

                Image of TX8100 AIR XS Silica Monitor
                TX8100 AIR XS Silica Monitor

                AIR X NEWS + CASE STUDIES

                GET AIR X NEWS + UPDATES

                  You may unsubscribe from these communications at any time. For more information on how to unsubscribe, our privacy practices, and how we are committed to protecting and respecting your privacy, please review our Privacy Policy.

                  Testing XD1+ Against Controlled Samples

                  test report

                  Test name

                  PT-01-26

                  Test date

                  October 2026

                  Product(s) tested

                  TX8061 XD1+

                  Test overview

                  The purpose of this testing is to establish the following understandings:

                  1. The testing protocol meets an accepted repeatability vs known methodology (gravimetric/XRD analysis) over numerous tests.
                  2. The XD1+ monitor demonstrates consistent results under the same conditions.
                  3. Under controlled conditions XD1+ meets the standards set out in the manufacturer’s information.
                  4. Confidence in the average measurement despite inherent variability in the characteristics of particulate including but not limited
                  5. to size distribution compound composition.
                  6. To provide information relevant to use applications to allow users to make considered decisions based on a local environment.

                  XD1+ LOCAL CORRECTION FACTOR

                  The XD1+ Personal Dust Monitor and supporting BreatheLITE software have been designed to make monitoring for hazardous dust in any working environment as straightforward and simple as possible, giving you complete control over the dust data you’ve collected.

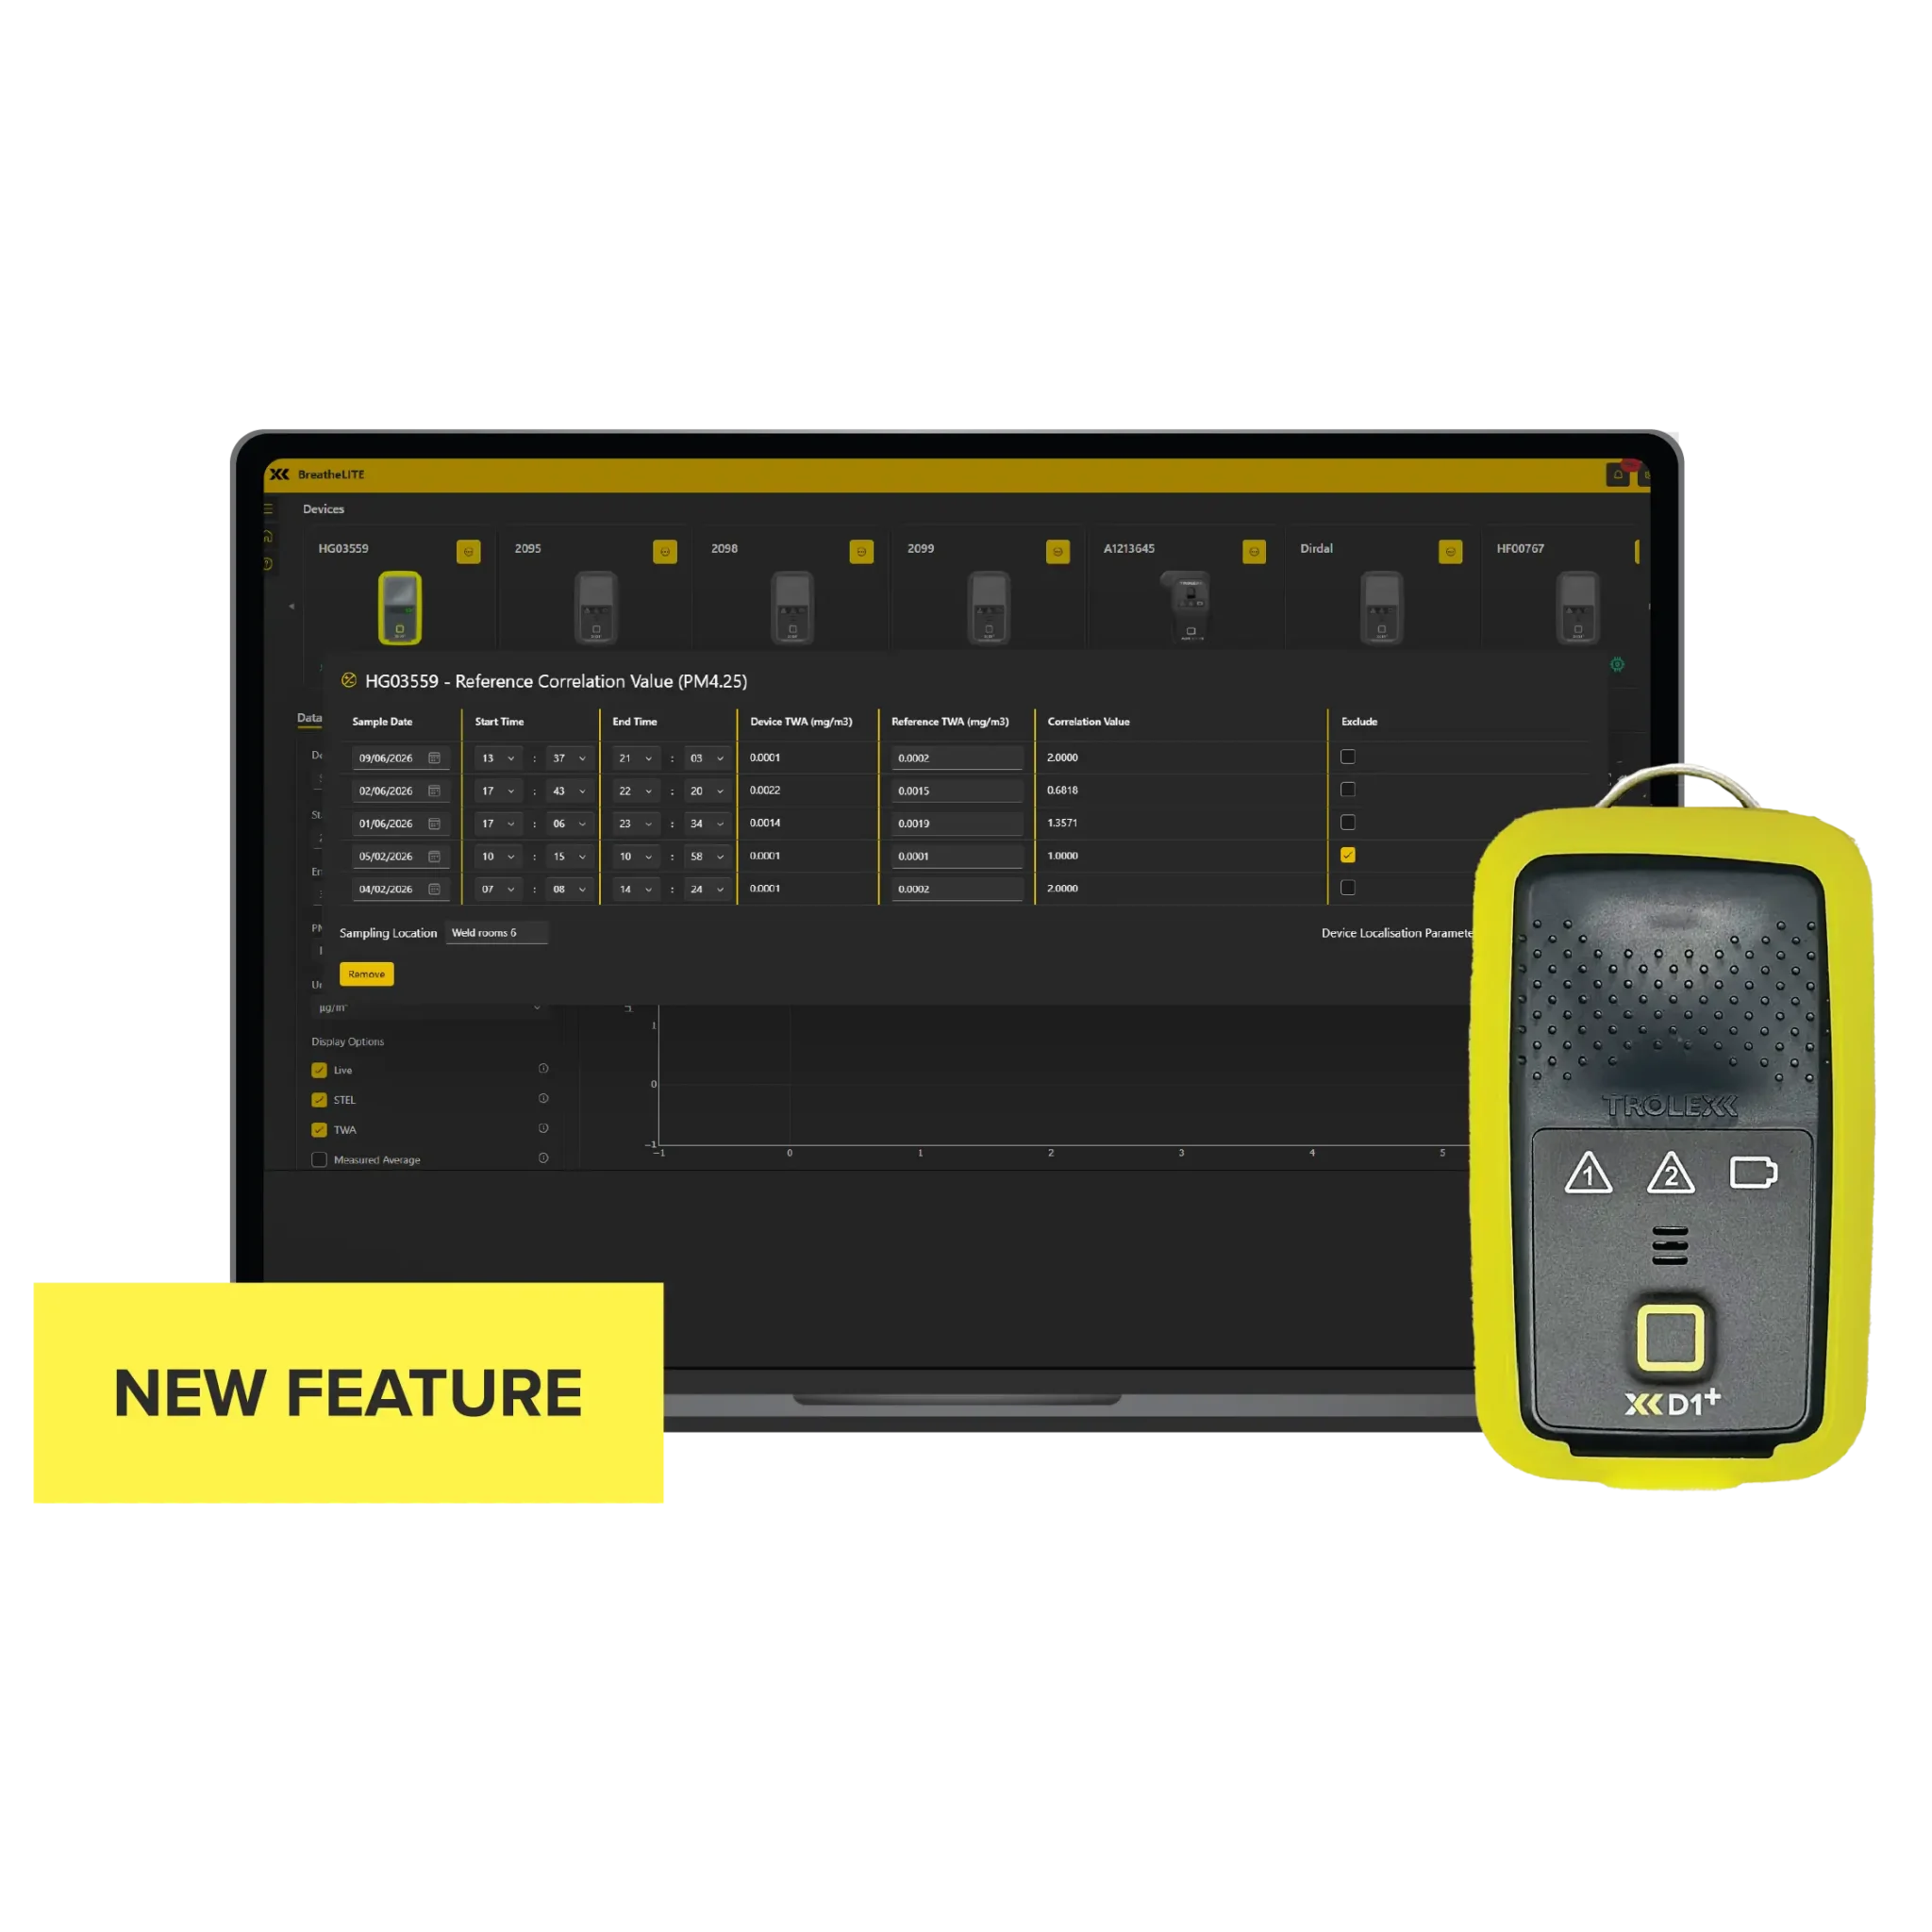
                  NEW LOCAL CORRECTION FACTOR

                  Icon.
                  Reference up to 5 external results
                  Icon.
                  Compare data
                  Icon.
                  Align data
                  Icon.
                  Localise results

                  ALIGN YOUR DATA

                  New local correction factor feature comes to BreatheLITE.

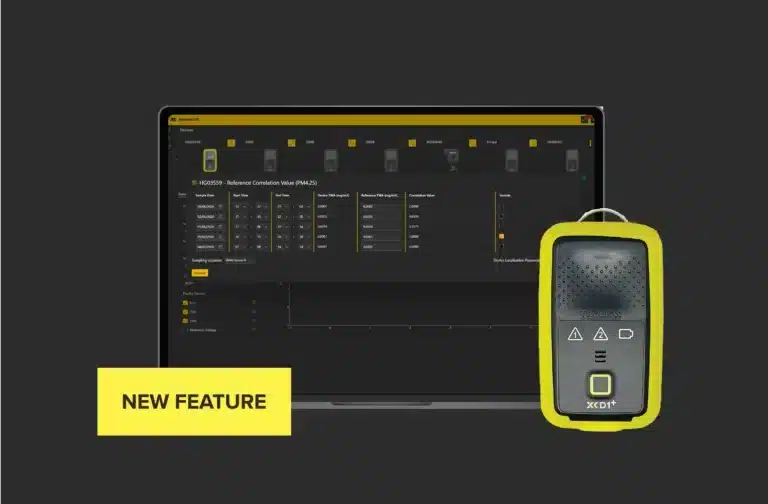
                  The newest setting on BreatheLITE for XD1+ brings a local correction factor feature which allows you to utilise and upload up to 5 external testing results to correlate and align with XD1+ recorded data over a set time period, for a more accurate and relevant data set, helping you to manage your exposure to dust. 

                  The local correction factor feature gives you the opportunity to have complete control over the data you gain from both XD1+ and any external testing you’ve had completed, such as gravimetric sampling, then keep record of both data sets and set a localisation parameter of all the data collected for specific exposure times. 

                  Whether you’re utilising data from reference sampling methods, or against another dust measurement device, this localisation feature allows you to automatically align and adjust collected XD1+ dust data, based on specific locations, environments or tasks, providing additional references for further accuracy and contextualisation of data. 

                  A suitable feature if you’re working in occupational hygiene and health and safety roles, by providing additional, relevant information, centralised all in one platform, simplifying the process of controlling exposure to hazardous dust and ultimately improving the accuracy of your dust monitoring.  

                  XD1+ and other real-time monitoring isn’t to be used instead of legislative or reference sampling methods, rather alongside it for an extra layer of data and accuracy. Now, with the BreatheLITE local correction factor feature, you’re able to see both data sets, side-by-side, and use XD1+ and BreatheLITE to determine exactly what you’re exposed to. 

                  XD1+  and supporting software provides state-of-the-art local correction factor feature for all workers and workplaces, in a way no other similar products currently on the market are capable of for no additional or hidden costs. 

                  GOT QUESTIONS?

                  BreatheLITE local correction factor feature for XD1+ allows you to upload up to 5 samples of external testing and data into the software as a localisation parameter alongside collected data from the XD1+.
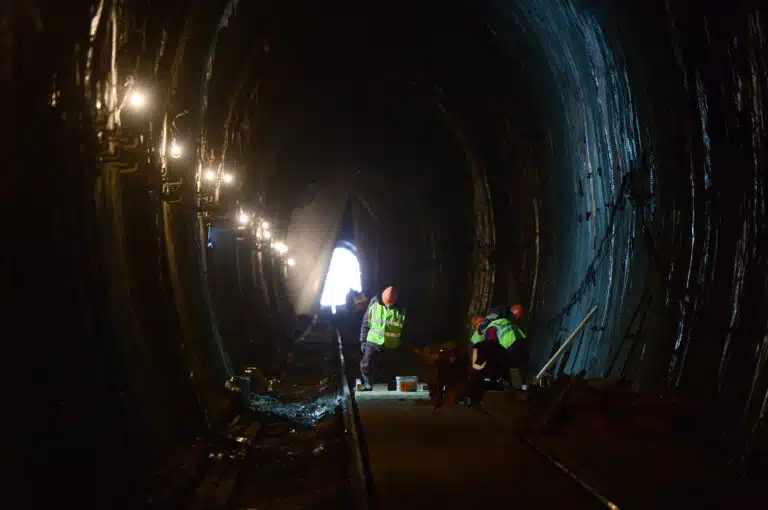
                  The BreatheLITE local correction factor feature allows you to benchmark the data collected by XD1+ against any external testing you have, including gravimetric sampling, and provides validity against recorded XD1+ data. 

                  XD1+ RESOURCES

                  PARTICULATE MONITORING

                  Image of TX8061 XD1+ Personal Dust Monitor
                  TX8061 XD1+ Personal Dust Monitor

                  Image of TX8005 AIR XD Dust Monitor
                  TX8005 AIR XD Dust Monitor

                  Image of TX8100 AIR XS Silica Monitor
                  TX8100 AIR XS Silica Monitor

                  Image of AIR X Software
                  AIR X Software

                  GET AIR X NEWS + UPDATES

                    You may unsubscribe from these communications at any time. For more information on how to unsubscribe, our privacy practices, and how we are committed to protecting and respecting your privacy, please review our Privacy Policy.